Monday, 16 May 2011
Washboard
It was confusing at start because i made the object appear round by accident. It took me awhile to figure out how to fix that and once it is done. i was able to continue following the instructions and successfully make this washboard.
Sunday, 15 May 2011
The tracks
The tracks were easy because the information provided to do this was clear and this i ran into no trouble in creating this except for the last part when i need to find out how to bend the tracks (there was a bend function that took me awhile to notice).
The bucket
The bucket was a little confusing to do but the hardest part have to be the handle because when i did the instructions, i may have messed up at some point causing the handle to look distorted (like a mirror reflection). But nevertheless, i managed to use extrude to complete the handle.
The bucket at the beginning was also hard but when i figure out that a line was used to form this shape it became quite easy when i learn that an object can be created by using boundaries.
Monday, 9 May 2011
Box
This was not easy as because of the instructions on trying to make the box appear realistic made some of the vertex appear connected to nothing and is stretching part of the box when attempting to move them, they also cause any normal vertex to appear weird when moved as well. deleting them made the model appear weird as well so it was limiting the box realistic appearance. other than that the box at the beginning was quite easy to follow.
Sunday, 8 May 2011
The boxes
This actually took me quite long to do as i was new to bevel. i also learn how to use boolean difference to create a hole in the triangle block. i also learn about edge tool and how to select the edges and bevel them
Friday, 6 May 2011
Rounded Box
In this model, i used a box and try manipulating the vertex.
what i did was i selected one side of the box and scale it down. after thet i selected the inner vertex and scale it down even more. with them moving forward as i scale it down gives it its rounded appearance.
Tuesday, 3 May 2011
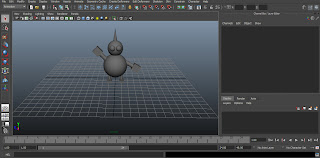
Here comes snowball the welcome robot
We love you snowball.
This was created for fun trying our basic shapes that was thought recently. i used boxes to represent the feet and hands and cylinders to represent the joints. the circle was to represent the body and the head and the eyes. followed by a cone that is on his head like primmy.
This was created for fun trying our basic shapes that was thought recently. i used boxes to represent the feet and hands and cylinders to represent the joints. the circle was to represent the body and the head and the eyes. followed by a cone that is on his head like primmy.
Primmy
Its primmy.
for this model i deleted one hand and one ear. after that i redo the hand to make it look like a gun and the one ear to appear like an antenna. i also made a small box tilted slightly to look like a switch. giving it a mean of stopping this destructive robot.
My primitive robot
My primitive robot.
I started with the feet, using 2 boxes to form the feet. after that i used 2 slightly tilted cylinder in each leg to form the heel of the leg. after that i used a circle to form the joint. after that a longer cylinder and a another circle. than another cylinder followed by a triangle. this formed the legs of the robot.
later, i made 2 small cylinders connect to a box and after that, a huge spring connecting the box to a bigger box above. later i placed a small but fat cylinder above the bigger box to form the neck. this formed the body of the robot.
i than used a circle followed by a cylinder to start forming the hand. than followed by another circle and cylinder than a box. at this point i used cylinders to form the fingers of the box. this formed the hand in total.
for the head i used a huge circle, than i used 2 small circles to form the eyes. after that i used 2 fat cylinders to form the base of their antenna/ear, after that i used a long stretch cone and 3 small torus of different sizes to form the antenna appearance.
Axe primative
My Primitive axe.
I started by using a cylinder to form the handle and cones to form the edges of the cylinder.
Later, i used circles to form the places where the circles in the axe model is and lastly, used a box to do the axe head.
I started by using a cylinder to form the handle and cones to form the edges of the cylinder.
Later, i used circles to form the places where the circles in the axe model is and lastly, used a box to do the axe head.
Subscribe to:
Comments (Atom)


